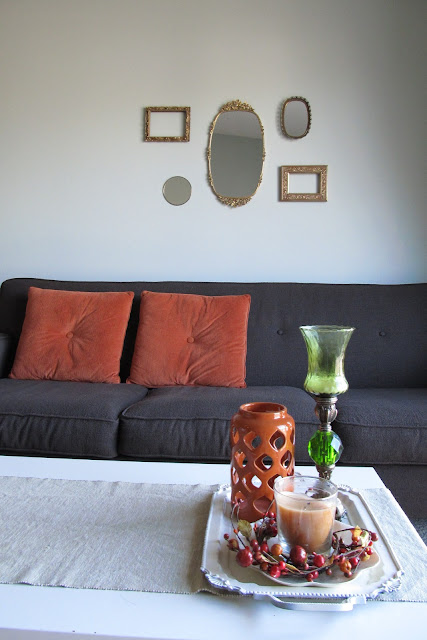
After months of having a barren wall above our sofa, we finally have a mirror gallery wall to fill the space and brighten up the room! I originally wanted a mirror for over our couch, but had a completely different look in mind. Here's the post where I share my Pinterest "inspiration" photos. However, after finding a beautiful focal mirror at a vintage sale, I decided to go a different route.
The bonus of choosing to do this instead of one of the ideas from my Pinterest catalog was that it used mainly things I already had on hand. The only thing I had to purchase was the center mirror (at $14, it was a steal!).
I had 2 other vintage style mirrors around the house. So I gathered those along with 2 gold-toned frames (with backing and glass removed) and created this grouping. I really love the way the mirrors bounce light around, and the structured (yet not too formal) arrangement.
In case you're wondering how to create a gallery grouping of mirrors, frames, or other objects, here's what I've found works well.
1. First, lay all of the object on the floor to decide on what arrangement you like best. It's easier to move things around and play with the arrangement when they are at ground level.
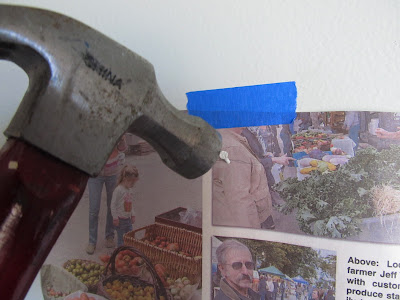
2. Lay newspaper under each frame and trace around it with a pen or highlighter (highlighters work especially well with newspaper!). Then cut out each shape and use masking tape or painter's tape to tape the newspaper shape onto the wall. (Oops, forgot to photograph that step!)
3. Next, if any of the frames do not have a hanging device, you can easily make one by hot-gluing a paper clip to the back. SO easy. Just be careful not to do this with heavy frames, it probably won't support too much weight. Both frames I used this for were really light.
4. Finally, mark the spot on each hanging shape where the nail should go. I just used a pencil to make a mark.
Once you have the nails in place, you can tear off the paper and tape, and hang your frame! Another little trick I learned is to use poster putty to center each frame, instead of a leveler. I'm too lazy to use a leveler, and I like it when frame galleries have a slightly off-kilter look. So, I just put a little dot of poster putty on the bottom two corners and adjust the frame by sight. Easy-as-pie!
I love how this gallery wall worked out. I think I will probably continue to add a few more mirrors/frames here and there as I find them, to beef it up a bit. But in the meantime, it's the perfect solution!


I love it!! That mirror was really an amazing find.
ReplyDeleteSo glad to see you put it up. I've seen the tutorials on how to use newspaper as templates for a gallery wall and still I insist that I can put the nails in the perfect place all by myself. I have a hundred little "mistake" holes on my wall.
ReplyDeleteGreat work! I love the talent and creativity!
ReplyDeleteThanks everyone! I'm glad it turned out. I definitely plan to add more mirrors too as I get them, it's looking a little sparse! =)
ReplyDelete